Completed parts - 6
Transidupe now has magnetic mounts.
You cut out a sheet of magnetic rubber material and glue it to the front plate. Then generate the Transidupe carriers with magholes = "true";. Now there will be holes cut for 12mm (1/2") magnets. Slide carrier first.
Slide carrier
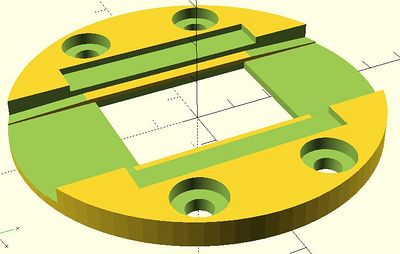
Here is the standard circular springpart slide carrier.
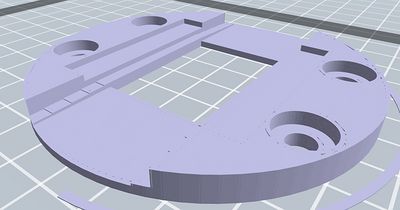
Here is the new "truncated" version of the springpart slide carrer (truncate = "true";). (It is quicker to print and (IMO) is easier to manipulate.) Otherwise, it has the same functionality as the non-truncated version.
Note that both versions have holes. They are designed for 12mm (1/2") neodymium rare-earth magnets. (Regular ceramic magnets aren't strong enough to stick to a sheet of magnetic rubber.)
Here is a working version of the truncated springpart slide carrier:
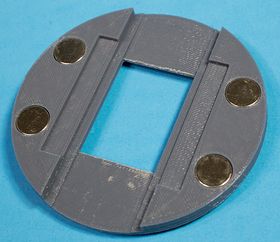
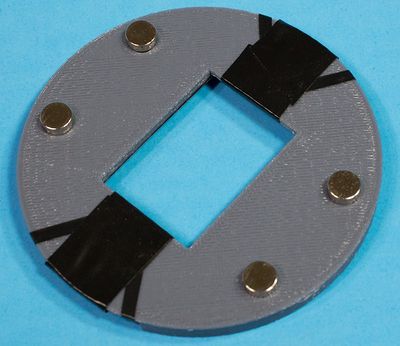
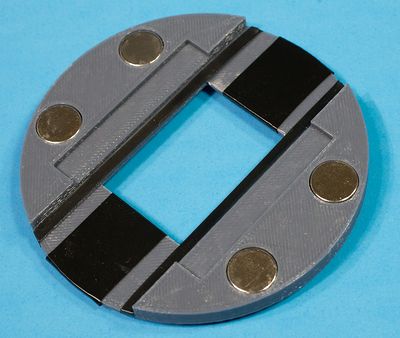
Springpart slide carrier magnetically mounted
Normally you glue the magenets into the carrier. For testing purposes, I use a smaller magnets on the other side of the carrier to hold the working magnets in.
Warning. These neodymium rare earth magnets are strong. Don't attempt to pull them apart! Instead, slide them apart. And keep them wall apart on your working surface. (They are also brittle.) And (it should go without saying), keep them out of the reach of small children. Really bad things happen if a child swallows these rare earth magnets.
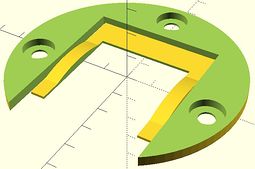
35mm Negative carrier
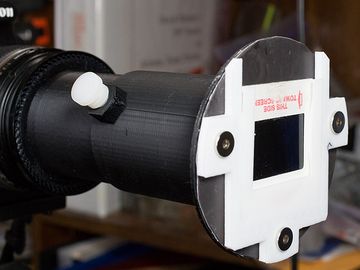
Negative carrier magnetically mounted
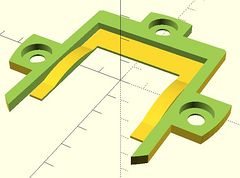
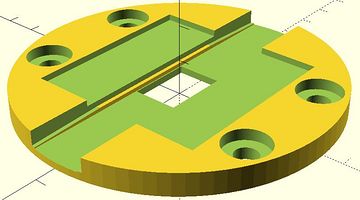
The negative carrier needs preparation. First look at the nice smoother render (as generated by OpenSCAD)
Notice how the sprocket hole rails have a gentle slope. However, FDM 3D printing prints in layers. Look at how the slicer will render the gentle slope:
Ouch! The slope is not so gentle now.
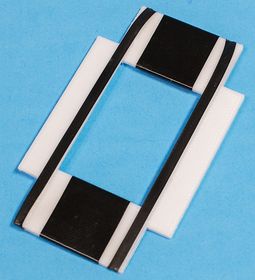
So we fix it by applying vinyl tape over the sprocket rails. First, here is a picture of a freshly printed negative carrier:
(I filed off some high spots in the film channels with a diamond dust nail file. Rub every surface where the image area of the film might touch with your fingers. File/sand, etc. until you have removed any bumps.)
Now we will apply two pieces of 1/8" Art tape to the rails and two pieces of 3/4" vinyl tape to the area where the film image might touch.
Start on the side that faces out. Apply the 1/8" Art tape first to the rails. Then apply two pieces of 3/4" tape.
I'm not going to supply extensive instructions on how to apply the tape. Look at the pictures.
This is the side that the negative slides through. Note that the tape seams are on the other side.
Do the same thing with the negative carrier top.

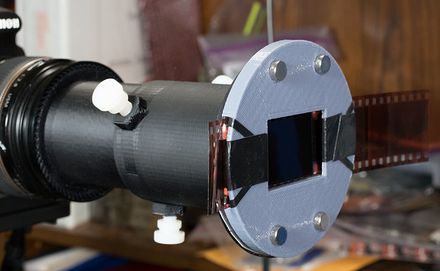
Assembled carrier with a strip of negative. (You normally put the assembled negative carrier and negative carrier top onto the front plate without any negative. Then you feed the negative in from the side, frame by frame.)
110 (Instamatic) Negative carrier
I decided that the 110 negative carrier didn't need taping, because 110 negative stock is less floppy, so the image area is less likely to touch the negative carrier. So all we need to see is the render.
Make it just like the 35mm carrier, except set
is110 = "true"
It is more or less just like the 35mm negative carrier, except the dimensions were adjusted to fit 110 negative stock. It uses the same tubes as the 35mm carriers.
You also need a 1/4 in. -20 nut and 1/4-20 thumb screw. (Alternate version) (You can also get a metal 1/4 in -20 thumb screw from Home Depot.), and a bunch of 3/4 in. mini spring clamps. You also might want to get a 20 pack of Suspend-it 1 in. panel clips (in case the back plate needs doesn't snap into place on the rear step-up ring.)
Flexible Magnetic Sheets with Adhesive (Note that the adhesive probably won't stick to PLA. I use 5 minute epoxy.), 12mm (1/2") neodymium rare-earth magnets (optional, smaller magnets for test holding the working magnets while testing)
See the parts list for more about parts.
Contact me about questions or suggestions
Questions? Write to transidupe@frogymandias.org