Printing TransiDupe
- Test part: for the diameter of the rear plate (with no threads.)
- Test part: for the diameter of the rear plate (with threads.)
- Test parts: for the diameters of the rear front and rear tubes.
- Make a ruler (to determine the number of sections you need for each tube.)
- Final part: the front and rear tubes
- Test part: To see if the slide carrier (springpart) fits on the front tube.
- Final part: the slide carrier and diffuser
- Contact me about questions or suggestions
3-D printing is slow, so it saves a lot of time and filament if you make small test prints so you can see that everything fits together, before you make the final prints.
Make (small) test prints before doing the final prints
The trickiest part is that there are four concentric tubes (more or less) that need to friction fit together. I brought all the variables that you'd need to tweak to the top of the TransiDupe.scad file. So you shouldn't need to root around in the body of the code to find these "tweak" settings.
I made provisions for making test parts that are smaller (in non-essential) dimensions so they will print faster. And for eliminating parts that aren't needed for a particular test. For example, you might want to start out determining if the two tubes fit together. So (while still in "exploded" (part="exploded";), temporarily eliminate the large round plates by changing makeroundplate="true"; to be makeroundplate="truex;" (anything except for "true", exactly is false. It is easier to change "true" to "truex" than it is to change it to "false".) When you save the file, the round plates should be gone.
Test part: for the diameter of the rear plate (with no threads.)
part = "reartube";
maketube = "truex";
labelcrossbar = "true";
makethreads = "false" (or truex)
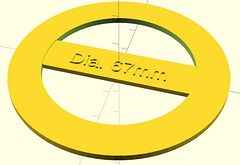
However, the rear tube needs to be attached to a step-ring, so let's test to see if the round plate on the back of the rear tube is the correct diameter. If labelcrossbar = "true";, then it will label the crossbar with the current value of reardiskdiameter. This can be useful if you are tweaking the value of reardiskdiameter to determine the exact diameter that fits into your step-up ring. Especially if you are putting threads on the outside of the plate (makethreads = "true";) However, labelcrossbar = "true"; adds about 17 seconds to the render.
If you make the rear tube with no threads, you must glue it to the step-ring. Or...
Test part: for the diameter of the rear plate (with threads.)
part = "reartube";
maketube = "false";
labelcrossbar = "true";
makethreads = "true"
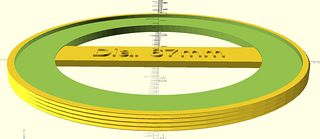
If you want to screw the rear tube into a step-up ring, you need to make the rear plate have threads. There are a number of variables associated with threads. Look at the comments about threads in TransiDupe.scad
If you make threads, you need to print the rear plate (and tube + plate) at your printer's finest resolution. This will take a while when you print the entire tube + rear plate so you will save a lot of time if you test by making the rear plate all by itself (maketube = "false";) If the threads don't fit exactly, adjust the value of reardiskdiameter up or down as needed. Until the rear plate will screw into your step-up ring.
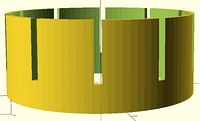
Test parts: for the diameters of the rear front and rear tubes.
number_of_rear_sections=1;
part = "reartube";
maketube = "true;
makeroundplate = "false";
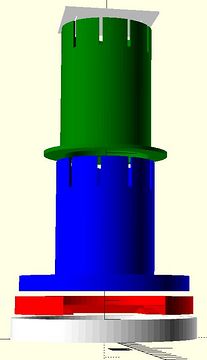
The next thing is to make the tubes be (temporarily) shorter. change the number_of_rear_sections and number_of_front_sections variabless to be "1" (or less.) Then you will have two short tubes (that still have the same diameters.) You can then make them for printing. Change part="exploded;" to part="reartube"; and save the file. Press F6 to render for real (will take a few seconds.) It will change to yellow and green when it is rendered. Then do "File/Export" and choose ".stl" You need to give it a meaningful file name, like "reartube_test.stl" Then check it (with netfabb, etc.) and print it.
 Then do the same thing with the front tube. part="fronttube"; and use a meaningful name for the .stl file) Print the front tube and then see how they fit together. The slotted section of the front tube goes over the slotted section of the rear tube. If the diameter of the front tube is too small (doesn't fit at all) or too large (too much slop), then adjust the value assigned to front_tube_tol up or down and re-render and reprint the front tube until they fit together. They should fit with a light friction fit. (It is designed such that you'd use a hose clamp to tighten it up in actual use. Is PLA flexible enough to use a hose clamp on the back of the front tube? Or would we need ABS?)
Make a ruler (to determine the number of sections you need for each tube.)

part = "ruler"; makes a ruler that is the length that your slide should be from the lens based on the total number of front and rear sections. This example is for number_of_rear_sections=3; and number_of_front_sections=3;. This should allow you to have some adjustment room (after sliding the front tube over the rear tube.)
Then decide how many front and rear sections you will need. (Each section is 23.3mm tall.) TransiDupe.scad has additional information about determining how many sections you need.
Before you print anything, put your camera on a tripod and then suspend a slide in front of the lens, with your light source behind the slide. Say with some kind of clip mounted on a stand. Adjust the distance between the front of the lens until the slide fills the frame when it is in focus. Measure the distance from the front of the lens to the slide. Then adjust number_of_rear_sections and number_of_front_sections= in transidupe.scad until the length on the ruler is close to the distance you measured. Now you know how many tube sections you need. (Remember that the front tube needs to overlap the rear tube.)
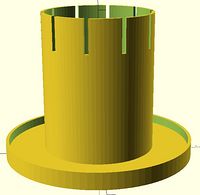
Final part: the front and rear tubes
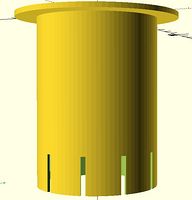
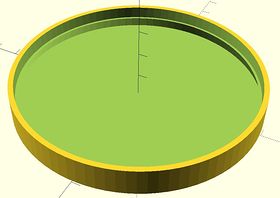
When you are done testing the front and rear tube diameters for fit, change makeroundplate to be "true" and number_of_front_sections to the number you determined with the ruler and render and print the front and tubes for real (so you will get a front round plate with a rim.)
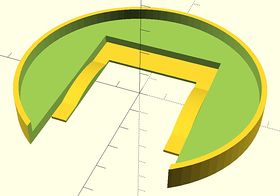
Test part: To see if the slide carrier (springpart) fits on the front tube.

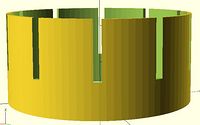
Then switch "part" to "springpart". There is a debug="truex" option (that should be "truex" to make full sized parts) that will make shorter parts with thinner plates. So first see how it looks with debug being "truex". Then change debug to be "true". springpart should get shorter. Render and print and see if it fits on the front plate of the final version of the front tube. The variable for adjusting the diameter of springpart is td2dh_sp Adjust this up or down as needed so that springpart fits as snugly as possible on the front tube.
Same deal with the diffuser. The variable for tweaking the diameter of the diffuser is td2dh_df.
Final part: the slide carrier and diffuser
When you've got springpart and the diffuser so they fit, change debug back to "truex" and render and print the final version of springpart and the diffuser.
Contact me about questions or suggestions
Questions? Write to transidupe@frogymandias.org