Converting using the ColorPerfect plugin with Photoshop

Shot with Canon EOS-M
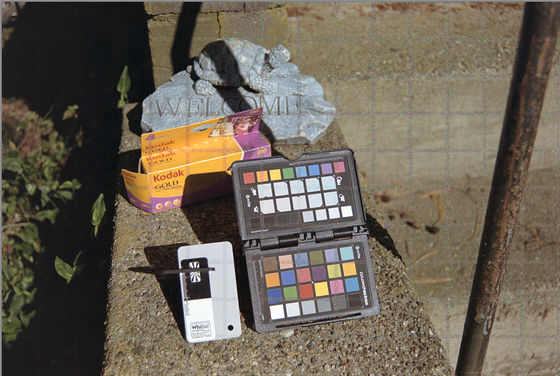
This is a reference. This is the scene shot with a Canon EOS-M. We want to convert the negative so that it looks like this.
Download ColorPerfect and MakeTiff from the ColorPerfect Downloads page. Follow the instructions in the README files in Zip files to install them. ColorPerfect is a PhotoShop plugin. MakeTIFF is a collection of several programs that makes a linear TIFF file in the format that the ColorPerfect plugin needs.
This example uses the same ColorChecker example file that other tutorials on this site use Download it if you want follow along. It is about 33 megabytes.
Use ColorPerfect MakeTIFF to make a linear TIFF file.
Start MakeTIFF
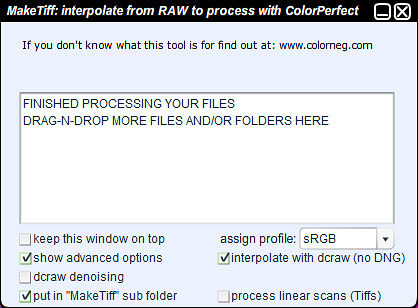
MakeTIFF
and drag the RAW file into the white box. It will process for a few seconds and will make a linear TIFF file. I checked "put in "MakeTIFF" sub folder so it wouldn't overwrite any other TIFF files I had.
I tried it with both ProPhoto and sRGB and it seemed to produce slightly better results for me with sRGB. The working color space in Photoshop should be also set to sRGB.
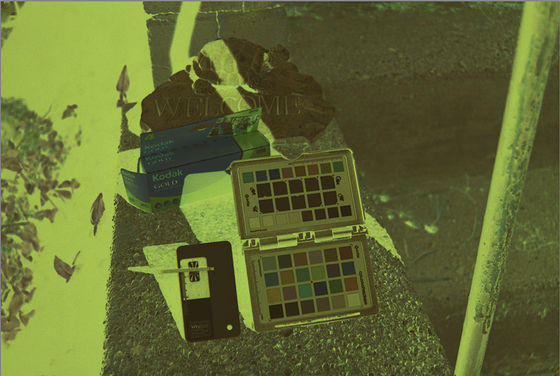
Open the linear TIFF file in Photoshop.
File/Open and open the TIFF file that MakeTiff just made. It should look like
Use the ColorPerfect plugin
It should show up under "Filter/CFSystems/ColorPerfect. If you don't see it, reread the README file that came with the ColorPerfect .zip file.
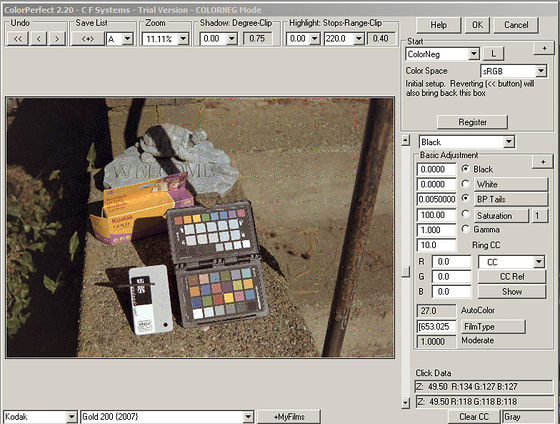
"Start" should be changed to "ColorNeg. "Film Type" should be set to "Kodak" and one of the "Gold 200" varieties. (The example file is Kodak Gold 200--you should make "File Type" match whatever film type you are converting.) Click OK.
This is the the conversion that ColorPerfect did. It has cross hatches in the image because I am using the trial version. Once you have bought a license and entered the license key, the cross hatches disappear.
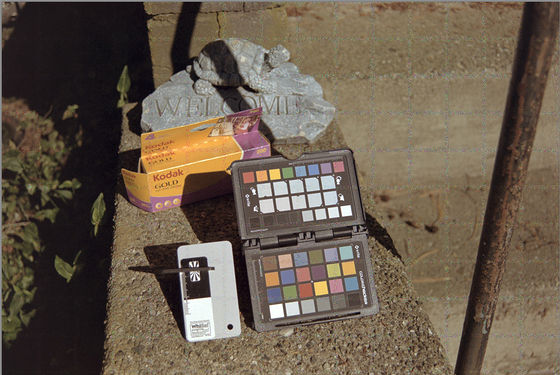
I tried tweaking the image using the same methods I described in my other tutorials. I got this.
And here is the reference image taken on an EOS-M
Shot with Canon EOS-M
ColorPerfect isn't bad, but I can't get it to give quite as good results as I get with my other methods. Using ColorPerfect is faster than the other methods I describe, but I haven't convinced myself to purchase a license yet. I'll use it on other negative conversions and will update this page if I change my mind.
YMMV.
Questions? Write to camerascanning@frogymandias.org