Preparing a Camera Scanned RAW file with Canon DPP
We will be using Canon DPP to convert the .CR2 raw file into a TIFF file with linear gamma. (My negative image doesn't look orange because it is already somewhat white balanced, because I did a custom white balance in the camera on an unexposed frame. I used this custom white balance when I shot the rest of the images on the roll.)
Load RAW file into DPP
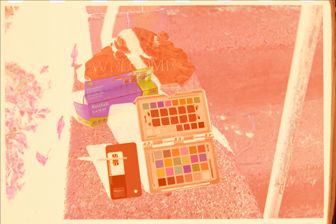
This is a frame of Kodak Gold 200 as it was
'camera scanned'with my Canon 60D
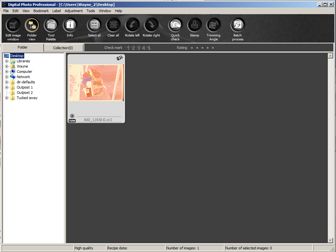
Drag and drop the .CR2 raw file into Canon DPP
Double click on the icon to open it in an editing window.
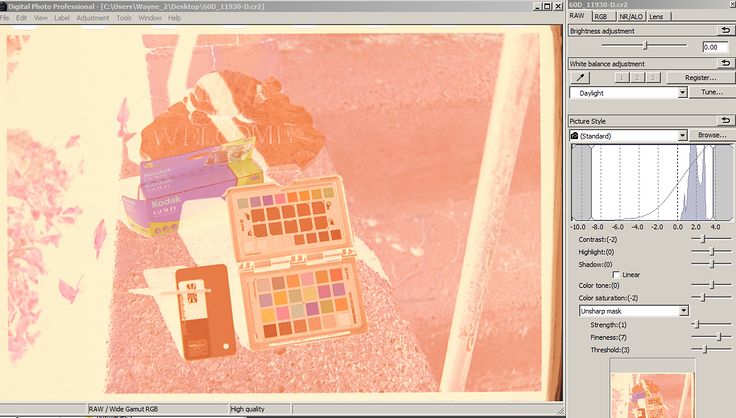
Needs adjusting in the 'RAW' tab
Make a linear file and white balance it
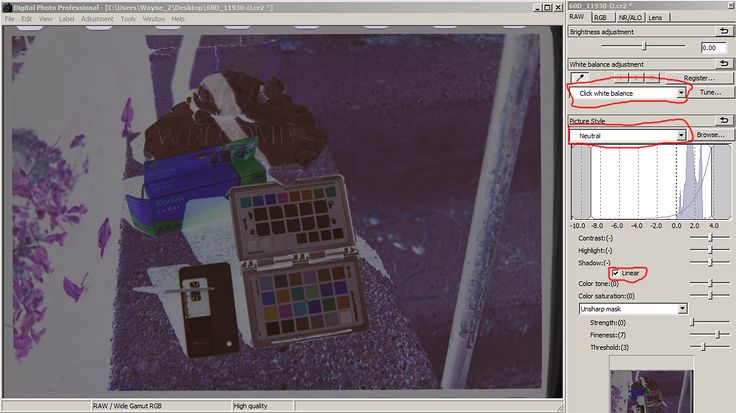
We want a linear file that is white balanced and uses the Neutral picture style
In the RAW tab, make sure that the "Linear" box is checked. (The image will look darker when you click the Linear checkbox.) Change "Picture Style" to "Neutral." Then click on the 'White balance adjustment' eye dropper and click somewhere in the frame that is neutral. In between sprocket holes or in between frames is a good place. The image should have more neutral areas. If it looks orange, then keep clicking until it has a tonality that is similar to the one in the screenshot here.
Set overall white and black points

Snug up the left and right sides of the histogram
Switch to the "RGB" tab. Adjust the endpoints to the black and white point of the histogram.
The point is that we are trying to do as much of the color conversion adjusting as possible in the RAW converter. Bearing in mind that the image that we export from the RAW converter must remain linear (not gamma corrected.)
Set the color space and export the TIFF file
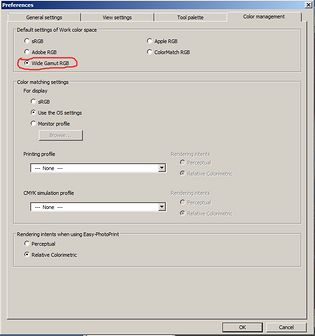
Optional. Set the output color space to Wide Gamut RGB
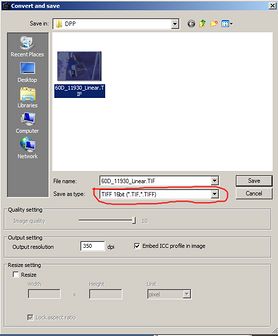
'File/Convert and Save' type 'TIFF 16bit'
Optional. Go into "Tools/Preferences/Color Management" and change to "Wide Gamut RGB" I've found in the past that colors on negatives sometimes don't fit into sRGB so I use a large color space until I am all done with the conversion and am ready to save. YMMV.
Use "File/Convert and Save..." Change the "Save as type" to "TIFF 16bit" Assuming that you are using something like PhotoShop that can deal with 16 bit TIFFs. The following steps will involve some radical curve twisting and anything 8-bit is likely to end up posterized. Again, YMMV, but I use 16 bit TIFFs.
Linear file exported from DPP RAW converter
The image you export from DPP should look like this:
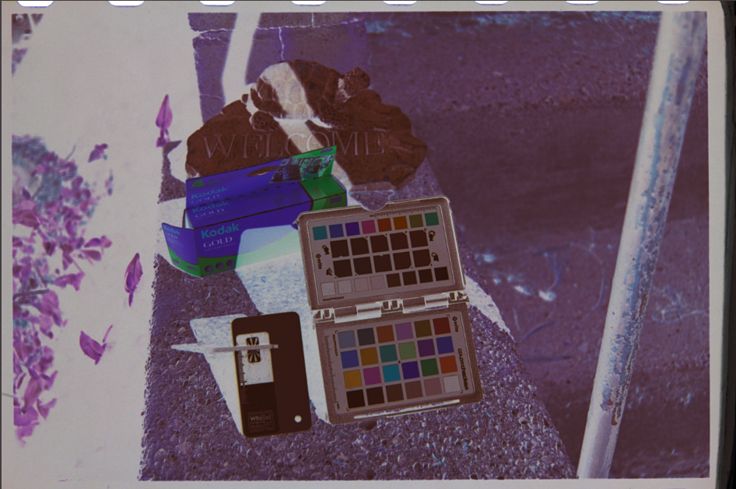
Negative, but linear and white balanced
At this point we have a 16 bit TIFF file that is white balanced and has had no gamma correction. We need to open the file in an image editing program to finish the editing.
Questions? Write to camerascanning@frogymandias.org