Camera scanning - different linear conversions
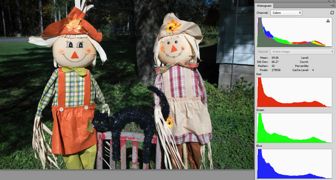
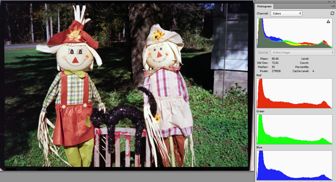
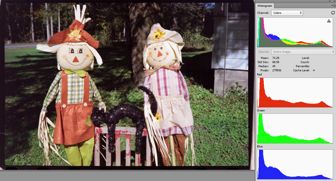
Shot with Canon EOS-M
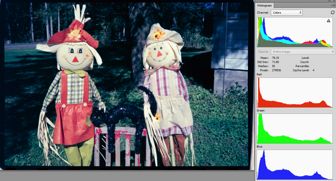
This is a reference. This is the scene shot with a Canon EOS-M. We want to convert the negative so that it looks like this.
The rest of the images are the results of attempting to convert a frame of Fuji 200 negative that was "camera scanned" with a Canon 60D + Canon 60mm macro lens.
The RAW file was loaded into each converter and a (supposed) linear 16 TIFF file was exported from each converter. After which, the following procedure was used to convert each version of the linear file. Photoshop CS6 was used.
- Invert with Curves/Negative
- Normalize the R, G, and B curves with Levels and going through each channel one by one to set the white and black points for each channel
- Convert the gamma with Curves and pulling down the composite RGB curve. I noted that each image then had a green cast, so I removed the green cast by pulling down the green channel.
At this point the conversions weren't perfect. I normally would go back into curves and tweak of the R, G, and B channels. But for this test, I stopped after doing the above three steps. Because they are mechanical and do not involve any fine judgement.
Some linear files converted better than others.
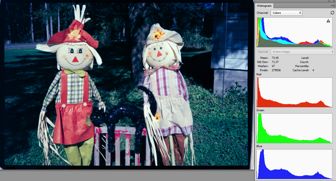
- Canon DPP white balanced
- Canon DPP white balanced and histogram stretched
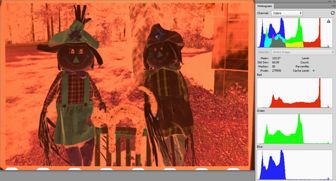
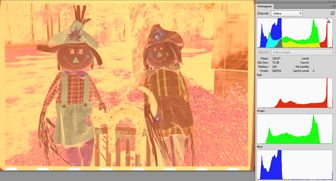
- Canon DPP not white balanced (native orange color)
- Canon DPP not white balanced (native orange color) and histogram stretched
- DCRAW -4 -T -o 4 %FILE%
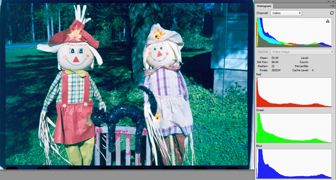
- Adobe ACR with RGB histograms filled in ACR 'Point Curve Tool'
- RawDigger 3 channel RGB and Autoscaled to fit
- RawDigger 3 channel RGB (Not autoscaled)
- RawDigger four (RGBG) channel, autoscaled and not autoscaled
- Conclusion
- Raw file for download
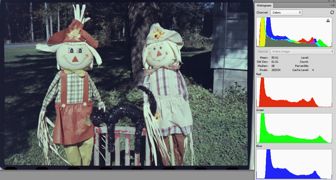
Canon DPP white balanced
DPP white balanced
Converted
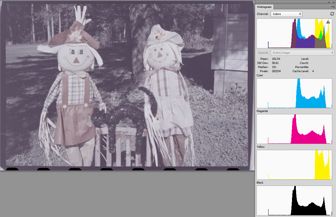
Canon DPP white balanced and histogram stretched
DPP white balanced and the RGB histogram stretched
with the "Tone curve adjustment"
Converted
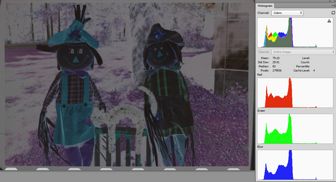
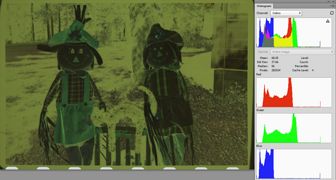
Canon DPP not white balanced (native orange color)
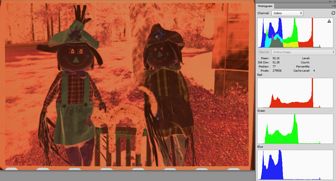
DPP No white balance (Real orange color)
Converted
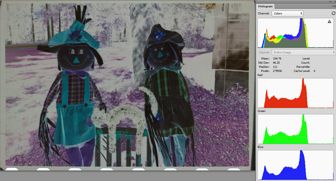
Canon DPP not white balanced (native orange color) and histogram stretched
DPP No white balance (Real orange color)
and the RGB histogram stretched
with the "Tone curve adjustment
Converted
DCRAW -4 -T -o 4 %FILE%
DCRAW -4 -T -o 4 %FILE%
Converted
DCRAW -4 -T -o 4 %FILE%

-4       Linear 16-bit, same as "-6 -W -g 1 1"
-6       Write 16 bit instead of 8 bit
-W       Don't automatically stretch the image
-g 1 1   Set custom gamma curve.
-T       Write TIFF instead of PPM
-o 4     Set output colorspace to ProPhoto
%FILE% is the RAW file
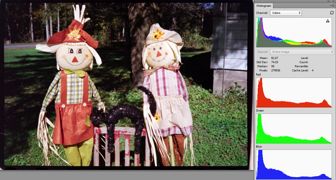
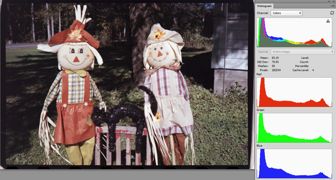
Adobe ACR with RGB histograms filled in ACR 'Point Curve Tool'
ACR with R, G, and B histograms filled
in ACR's 'Point Tone Curve'
Converted
ACR apparently did the gamma correction, because I didn't need to do step 3. "Convert the gamma with Curves"
RawDigger 3 channel RGB and Autoscaled to fit
RawDigger exported TIFF with
'3 channel (RGB output)' and
'Autoscale to use full 16 bit range'
checked
Converted
Green is high compared to all the other files. (Because there are two green channels in Bayer RAW files?)
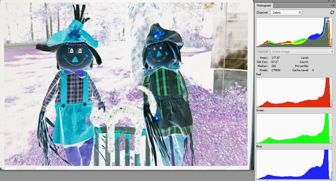
RawDigger 3 channel RGB (Not autoscaled)
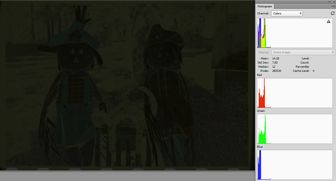
RawDigger exported TIFF with
'3 channel (RGB output)'
checked
Converted
The histograms ave very tiny and were difficult to work with in Levels. So not surprised at the uninspirational color.
RawDigger four (RGBG) channel, autoscaled and not autoscaled
RawDigger exported TIFF with
'Autoscale to use full 16 bit range'
checked
RawDigger exported TIFF with
'Autoscale to use full 16 bit range'
not checked
These come into Photoshop as CMYK, apparently on the assumption that if there are four channels (R, G, B, G) then it must be CMYK. No particular good came from trying to convert these so I didn't show any conversions. Note that they come into Photoshop already inverted--I didn't invert them.
Conclusion
Conclusion: For this particular test "ACR with R, G, and B histograms filled in ACR's 'Point Tone Curve" had the best conversion. Followed by "DPP white balanced and the RGB histogram stretched with the 'Tone curve adjustment'" A look at the RGB curves as they came into PhotoShop should tell you why.
Raw file for download
Actual Canon 60D Raw file of the camera scanned negative so you can practice on it. About 38 megs.
Questions? Write to camerascanning@frogymandias.org