TransiDupe.scad OpenSCAD Transparency Duplicator
TransiDupe
The idea is to adapt the DupliHood (Thingiverse) openSCAD script to make components that are Xtend-a-Slide compatible. i.e., the front and rear tubes should be the same size as Xtend-a-Slide tubes (except for being printable with a 3-D printer.) The Slide Carrier and Diffuser should fit on an existing Xtend-a-Slide. Well, when we get all the assorted fudge factors figured out.
- All parts exploded
- Rear Tube
- Front Tube (35mm)
- Front Tube (6x6cm slides; 120 film)
- Springpart Slide carrier
- Springpart Slide carrier truncated
- Negative carrier for 35mm film
- Negative carrier for 110 (Instamatic) film
- Negative carrier for 120 medium format film
- Ruler (for determining the number of sections you need for each tube.)
- Calibration slide
- Making TransiDupe
- License
- Contact me about questions or suggestions
All parts exploded
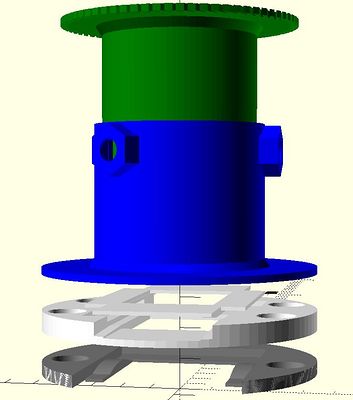
part = "exploded";
number_of_rear_sections=2;
number_of_front_sections=2;
film = "film35"; (for all the rest, except for "6x6cm mode")
Top to bottom
Rear tube (upside down for printing)
Front tube
Negative carrier top
negative carrier
Springpart slide holder
I don't think that this is printable. But it is handy to see all the parts rendered at once. You can load it into netfabb to see the total amount of cubic centimeters that all the parts will use.
Rear Tube
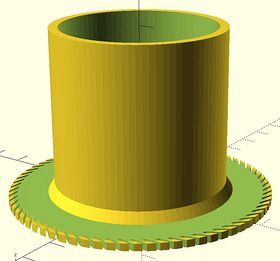
part = "reartube";
number_of_rear_sections=2;
This tube is designed to be attached to the step-up ring that is attached to the lens. The slanted slots allow the rear tube to snap into the step-up ring.
The diameter of the round plate is set with the reardiskdiameter=... variable. Set this to match the stepup ring you plan to use. I'd suggest either 67mm or 77mm.
It should be printed with black filament.
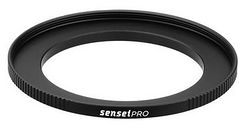
step-up ring
Front Tube (35mm)
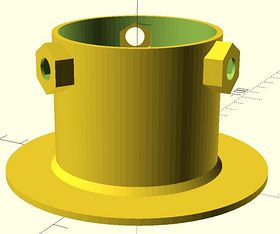
part = "fronttube";
film = "film35";
magholes = "true";
number_of_front_sections=2;

This tube is designed to be slid outside the rear tube. The nut traps are designed to hold 1/4-20 nuts. Thumbscrews thread through the nuts and bear against the rear tubs.
A rubber ring of rubber magnet is glued to the front plate. The slide (or negative) carrier is designed to have strong rare earth neodymium magnets that stick to the rubber magnet. (See slide and negative carrriers, below.)
Front Tube (6x6cm slides; 120 film)
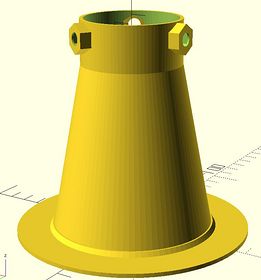
part = "fronttube";
film = "film6x6";
magholes = "true";
number_of_front_sections=5;
The front tube when resized to work with 6cmX6cm slides. (120 film) Or for use with 120 film negatives. (I do not have any 6cmX6cm slides so I can't test it.) I do have 120 film, so this will be tested.
The diameter of the rear tube is unchanged. The back of the front tube is the same diameters as the 35mm version. The front is expanded to work with 6x6 slides (or 120 film). The rear tube can't be longer than two sections (three, if you can live with vignetting outside of the (square) image frame.
It should be printed with black filament.
-->
Springpart Slide carrier
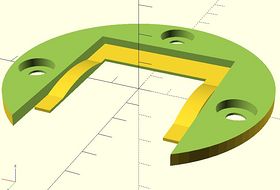
 part = "springpart";
truncate = "false";
magholes = "true";
Designed to mount magnetically to a rubber magnet sheet that is cut out and glued to the front plate.
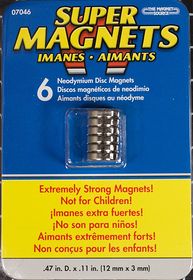
The rare earth neodymium magnets should be glued into the holes. I've found that five minute epoxy works.
Springpart Slide carrier truncated
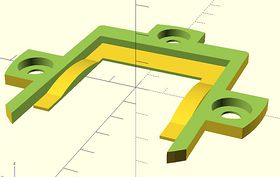
part = "springpart";
truncate = "true";
magholes = "true";
Same as the springpart slide carrier, except unneeded portions are removed. This improves print speed and is (IMO) easier to handle when positioning the slide.
Negative carrier for 35mm film
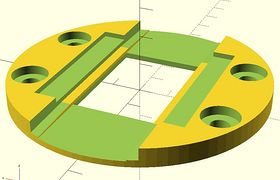
part = "negativecarrier";
film = "film35"
is110 = "false";
magholes = "true";
Patterned after my custom negative carrier for Xtend-a-Slide. Designed to magnetically mount to the TransiDupe front plate (both 35mm and 120 film.) This one is for 35mm.
Negative carrier for 110 (Instamatic) film
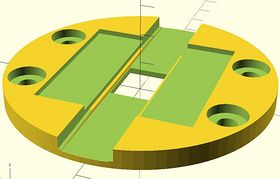
part = "negativecarrier";
film = "film35"
is110 = "true";
magholes = "true";
Negative carrier for 110 (Instamatic) film
Negative carrier for 120 medium format film
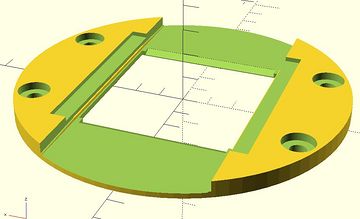
part = "negativecarrier";
film = "film6x6"
is110 = "false";
magholes = "true";
Negative carrier for 120 medium format film. (6x6cm == 120 film.)
Negative carrier (top part) for 35mm film
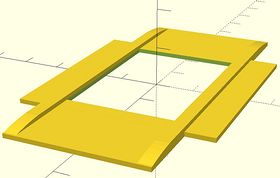
part = "negativecarriertop";
film = "film35"
is110 = "false";
Top part for 35mm negative carrier.
There are top parts for the 110 and 120 (film6x6) negative carriers. Change the film and/or is110 variables accordingly.
Calibration slide
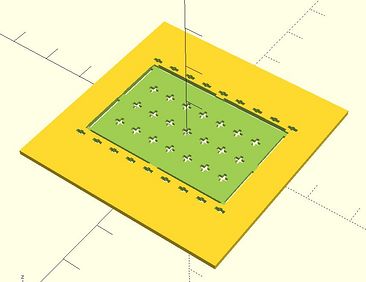
part = "calslide";
This calibration slide is for adjusting the length and levelness (rotation) of the front tube. It is the size of a standard 35mm slide. The image frame has crosses on the top and bottom (so you know where the top and bottom of the frame is.) Adjust your slide carrier so a few of the center cross hatches are visible. Maybe double check focus with a real slide (adjusting focus also adjusts focal length...) Then lock down the front tube.
Or use the cross hatches on the horizontal cross bar in the slide frame to validate focus with the calibration slide before you lock down the front tube.
It should be the exact size as a real 35mm slide.
Making TransiDupe
Download TransiDupe.scad and open it in OpenSCAD. Edit the part=... variable according to the part you want to make. F5 to preview. F6 to render for real (should show up as yellow and green.) Then File/Export/Export as STL... to make an .stl file. (You need to give the .stl file a meaningful file name. i. e., calslide.stl for the calibration slide. etc.)
You can verify the part (.stl file) with (free) netfabb basic. Once you have netfabb installed. Do Project/New and then Project/Open Navigate (if needed) to the .stl file. (Use right mouse button to rotate the model.) Check the Information box to see if the dimensions are correct (this is why TransiDupe.scad has lots of additional logic to disable rendering certain parts--so you can export an .stl and check that and measurements are what you expect them to be.) Note the Volume shows how much filament will be used, in cubic centimeters. This is of interest if you are having something printed at Shapeways that charges by the cubic centimeter...
License
TransiDupe is released under the Creative Commons - attribution license.
Contact me about questions or suggestions
Questions? Write to transidupe@frogymandias.org